
If you notice your bike starting to weave or wander on the road, you might need new steering head bearings.
The condition of steering head bearings can greatly affect your bike’s handling, and they wear out very differently from wheel bearings. Whereas wheel bearings spin with their rollers constantly revolving in their races, steering head bearings only operate within a limited range. The latter’s rollers are therefore always working over the same spot on the bearing race, which can eventually create notches on the race surface. This is the most common type of steering head bearing wear and it’s very easy to diagnose.
To do this, simply support the motorcycle with the front wheel off the ground and turn the forks gently from side to side, paying particular attention near the centre, when the wheel is pointing straight ahead. Cables connected to the handlebar might snag on part of the bike and might give a false sense of wear, in which case it’s best to remove the clutch cable and throttle assembly from the handlebar.
If, with the bearings properly adjusted, the movement of the fork through its central position is smooth, they are in good condition. However, if the fork wants to centre itself as you turn it just a few degrees off centre, it means there are notches worn into the bearing race. This will cause the bike to weave at high speeds and wander from side to side at low speeds as the fork tries to centre itself.
 Motorcycle manufacturers use one of three types of bearings in the steering head: loose ball bearings, utilizing either individual or caged balls, which are most prone to premature wear; tapered roller bearings, which are more robust, and are readily available in aftermarket kits as replacements for ball bearings; and sealed bearings, which are the toughest and most rigid perpendicularly, which is why they are often used on supersport machines.
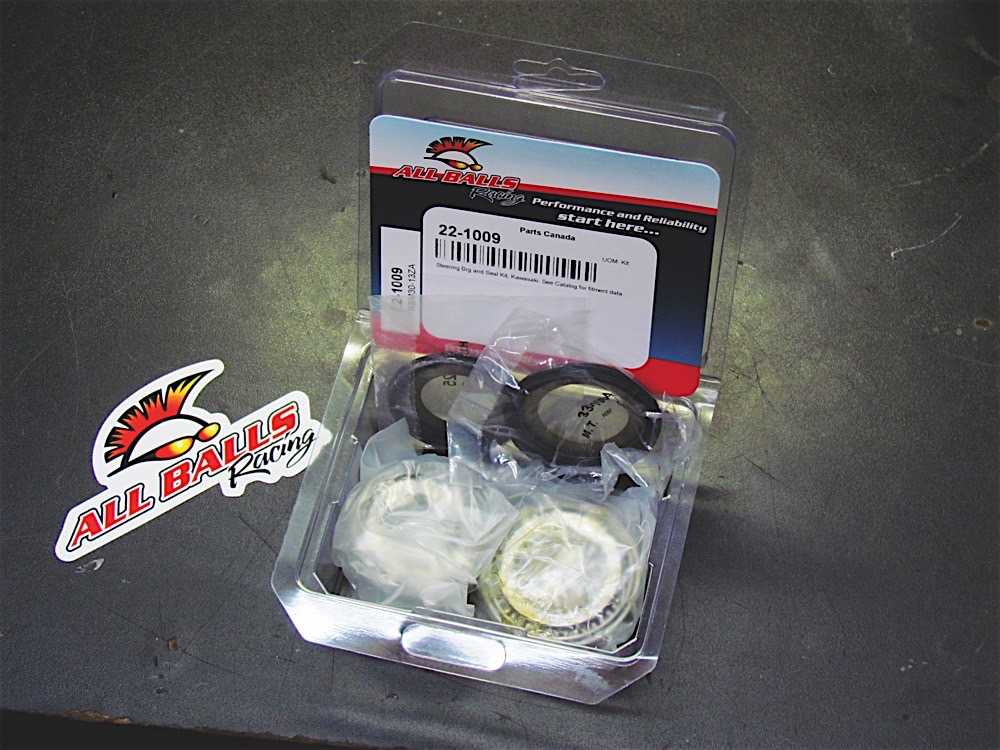
My Kawasaki KLR650 recently exhibited the symptoms described above, wandering gently from side to side as I came to a stop, indicating there was some resistance in the steering. A quick verification revealed that its fork was self-centreing; disassembly revealed that not only were the bearings worn, but also that the lower bearing was corroded. The KLR has tapered rollers, so I ordered an aftermarket replacement kit made by All Balls, which included the bearings, and upper and lower dust seals.
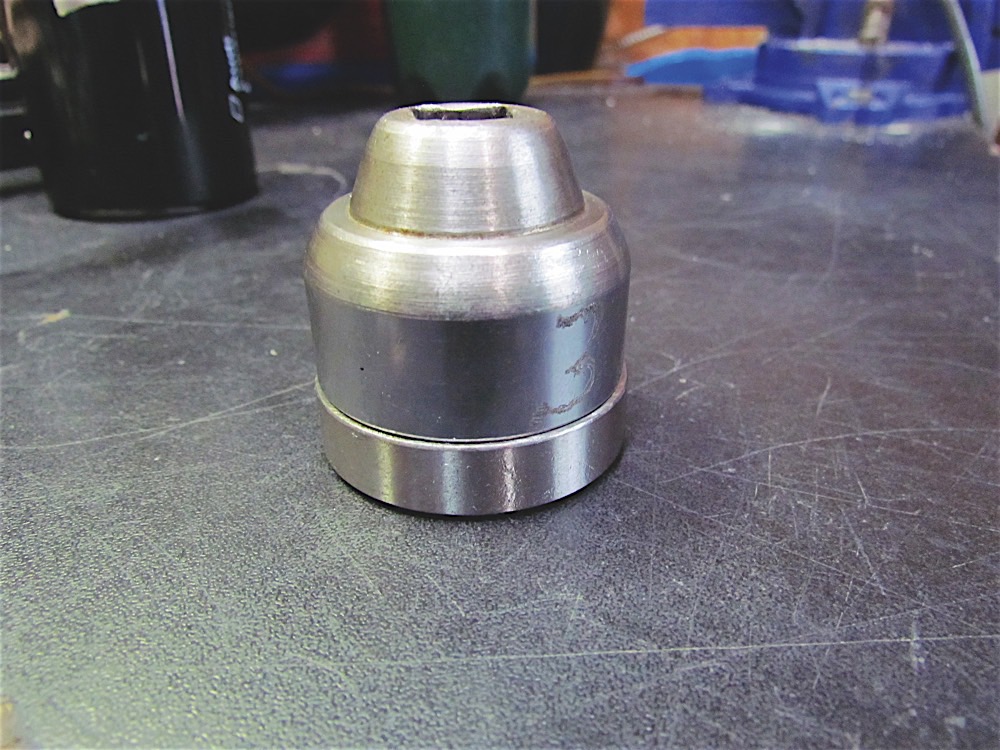
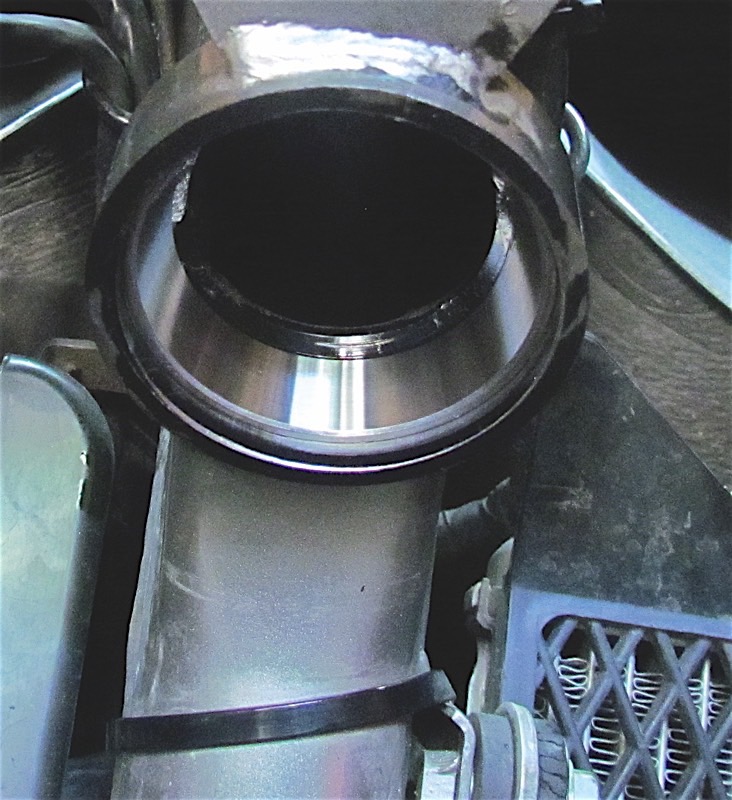
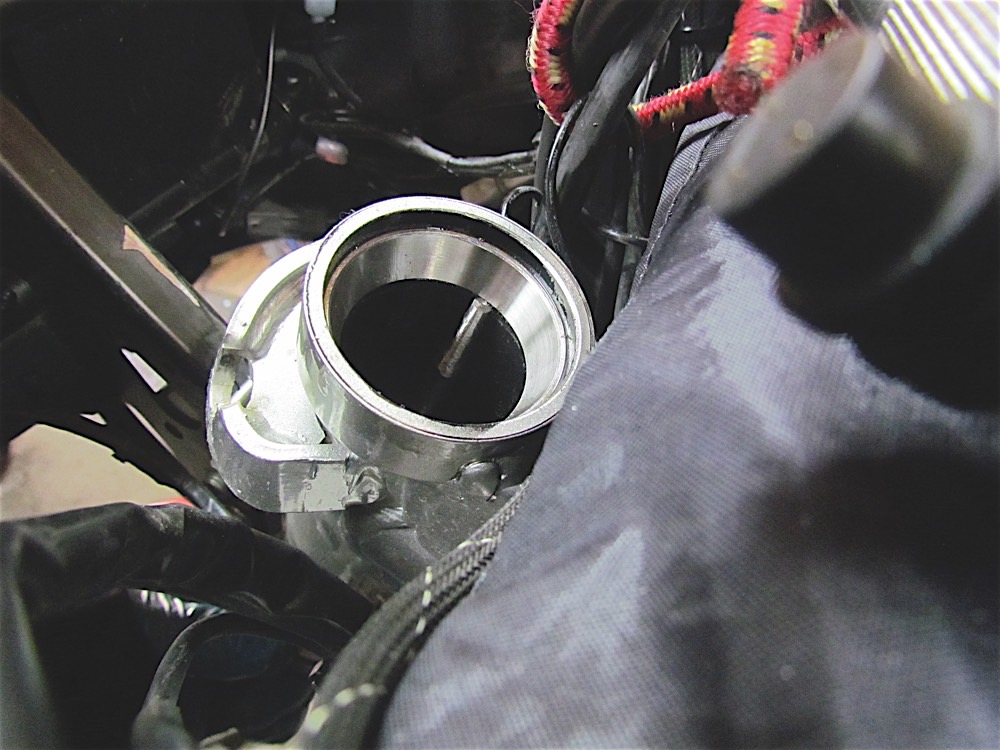
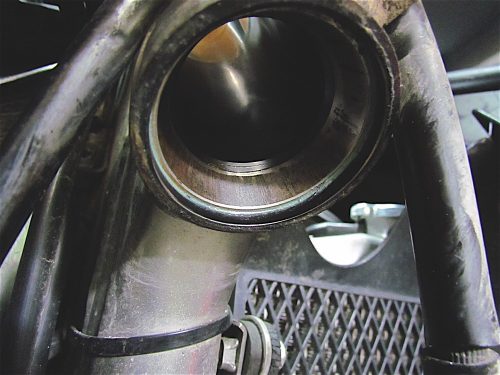
Once the wheel and forks are removed, the top bearing is the easiest to remove, since it slips off the triple clamp without any pressure to allow easy disassembly of the front end. The lower bearing is pressed onto the triple clamp, as are the outer races into the frame. Regardless of what type of bearings are used, the best way to remove pressed-on bearing races is with a bearing removal tool. This is a rather expensive addition to a home mechanic’s toolbox, considering the few times it will be used on a personal motorcycle. The alternative is to drive out the races with a drift punch.
 Usually, the inner edge of a bearing race protrudes into the centre bore of the steering head, providing an edge to rest the punch on and drive it out. Clean the frame very well so as not to lodge any dirt between the race and the frame when driving it out, and apply some oil to make the job easier. To drive out the old race, tap on it incrementally at opposite sides, slowly “walking” it out of its bore.
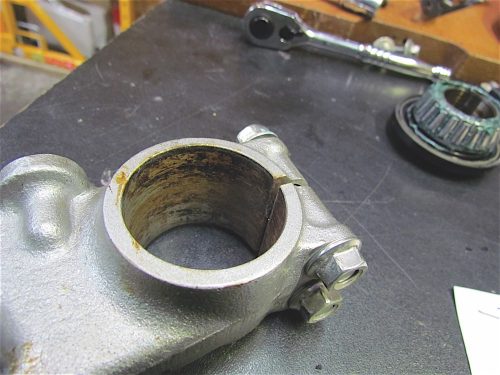
If the inner edge of the bearing race doesn’t protrude into the bore, you will need to get creative. One way to remove such a race is to weld a bead around the bearing surface: when the weld cools, the bearing will shrink and drop out. Another way is to drill two holes into the steering head, adjacent to the bearing race, and drive it out using a punch. The holes can later be plugged with silicone to keep water out, and uncovered for future bearing service. To remove the lower bearing from the triple clamp, cut the bearing cage off if it has one and use the upper lip to drive it off with a punch.
 When pressing on new bearings, apply oil to the frame and triple clamp shaft, and drive the bearing and races in slowly and evenly, again walking them in at opposite sides. A large socket that matches the race’s outer circumference but is a bit smaller than the frame’s bore can be used to drive the bearing in all the way. The bearing is fully seated when the sound of the hammer blows becomes sharp. Applying some heat to the frame can ease the job, but this should be done very carefully so as not to damage the paint. Once installed, apply a waterproof grease liberally before reassembling the triple clamps.
Next month, we’ll discuss the steering head and adjusting the bearings.
Technical articles are written purely as reference only and your motorcycle may require different procedures. You should be mechanically inclined to carry out your own maintenance and we recommend you contact your mechanic prior to performing any type of work on your bike.